We have covered in previous #LarrysLessons how to prepare your walls for paint and which paint finishes to choose, depending on the type of surface and your desired outcome. We are now, finally, covering the steps on how to paint your home. This article is specific to interior walls in residential, commercial or industrial spaces. If you have not already looked at our previous articles, please do review How to Prep Your Walls and How to Choose Your Finish before beginning this one.
Now let’s begin…
- SPACE or ROOM Yes this is obvious place to start and may seem unnecessary but I am including it as it will affect all the items following. This will be on your mind throughout the whole process of picking colours, finish and how much prep you will be doing. Your living room will need more quality prep and finish than the laundry closet or basement recreation room.
- COLOUR The next step is to choose your paint colour from a quality paint provider, such as Dulux, Sherwin Williams, Behr and Benjamin Moore. All the major manufacturers have strong online presences, showcasing all their colours and current trends. Google them and browse and head over there, take a look at the colour options and make your choice. For a price, you could also employ the services of an interior decorator to help choose colours and schemes.
- FINISHES Now that you have your desired colour, choose the appropriate finish. The finish you end up with will vary depending on where it’s going, what look you want to achieve and how long you want it to last. Please check out the aforementioned article we wrote on Paint Finishes, review the instructions on the paint container’s label or contact us for professional painting advice.
- PREP Beyond the prep of the wall itself, you will need to set up the space to protect your furniture and floors and to facilitate an efficient painting process. This should include moving any furniture to the middle of the room or outside if possible, removing large light fixtures or outlet covers, putting down drop cloths near the walls, and any additional prep you may need as gone over in our previous article.
- SHAKE Grab your paint can and DO NOT open it. First you want to ensure it is not open (especially if it is a previously used paint can) by taking a wooden stick and hitting around the paint cover’s rim to slam it closed. Then you grab the bottom and top of the can with both hands and make an alternating rotating motion in order to mix the paint. This will ensure the paint is even.
- OPEN Open the paint can by using a can opener, screwdriver or “6 in 1” tool and placing it under the rim of the paint cover and flipping the cover open.
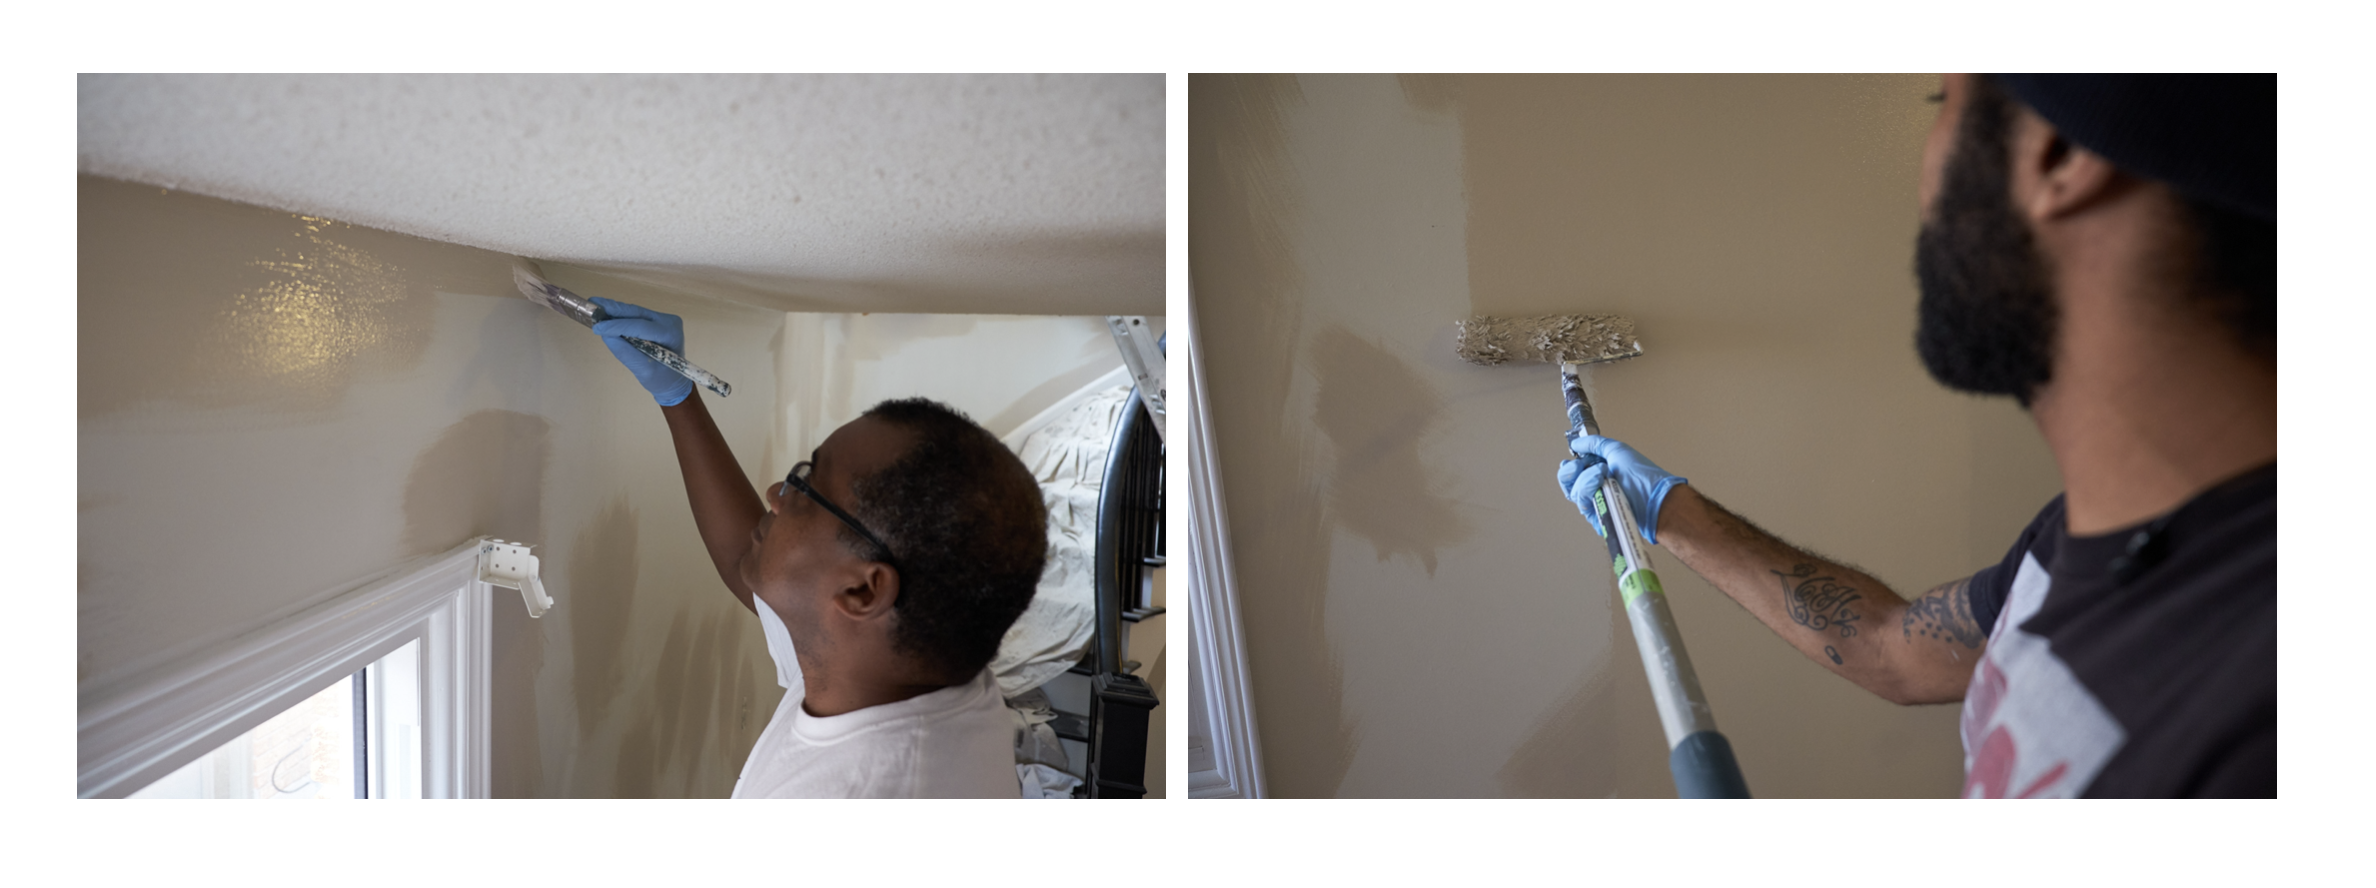
- APPLY PAINT Firstly you will use a paint brush to cut (paint an edge using a brush) the wall that borders the ceiling, trim, outlets and wall fixtures. If you are a beginner or novice, I would advise you use painters tape to cover the areas that you do not want paint on. Make sure you press it down firmly so the paint does not seep under. After cutting around the walls, you apply paint to the broad and open areas of the walls with a roller. Make sure you give a smooth finish by not putting on too much paint and going over any lines you may see.
- DRY Let it dry for 1-4 hours (or sometimes more), depending on the instructions from the particular paint manufacturer.
- RE-APPLY Apply another coat as needed to have an even, smooth finish with no previous wall colours peaking through.
- DRY Let it dry again. The timing will depend on the paint manufacturers. Some paints boast dry times of as little as 20 minutes!
- CLEAN Clean up your tools and materials – including the floors. You can move your furniture back right away. Just be sure to avoid scraping the walls. If you need to hang any pictures or fixtures, ensure the wall is fully dried (which may take a day or more).
- CURE Leave the wall for about 14 days to cure, before cleaning it.
- ENJOY YOUR NEW SPACE!
This is our professional advice on how to paint walls. Naturally, every room is different! It is important to do adequate research and preparation before changing your home. We encourage you to reach out to us, the professionals, if you are wary of your ability to apply quality, even and long-lasting paint to your space. We provide quality every time. Our two locations are in the Greater Toronto Area and Cambridge area! See below for our contact information. Thank you for reading!
For PRO PAINTING SERVICES:
sales@larryspainting.ca
(416) 690-3890


