Welcome back to our #LarrysLessons Series! In todays lesson we are going to be going over how you can repair areas of your wall.
We all have experienced the moment when we look around our home and realize that the walls are starting to look older. With life being busy and active, walls get scratched, things spill and damages are made. But when you can repair them and repaint your walls you can start afresh – with a new look that will set you at ease when you enter your home.
Follow these steps where we provide our professional expertise on how to repair spots on your walls before proceeding with painting.
Let’s begin!
- Inspect walls for dust, stains, roughness, cracks, bumps, gouges, holes, water damage, flaking and soft walls.
- Dust: simply wipe, brush or broom the surface till all dust is removed.
- Stains:
- Use a warm damp cloth to wipe off stain.
- If warm water is not sufficient to remove the stain, use a gentle soap clearer and then wipe with water.
- If that doesn’t work, you can use a purpose built wall cleaner like Goof Off, Zepp, TSP or Goo Be Gone.
- If none of these above methods remove your stain, you’ll need to put some paint on that wall.
- Rough Walls: (Usually a result of a bad paint job or just old walls)
- You will need to sand the walls before putting on a new coat of paint. Use a pole sander with a medium grit sandpaper (100 – 150) to sand your walls from top to bottom. This will take off the high spots on the walls and make it smoother.
- Now you can paint your wall, making sure to roll over the walls well to ensure no bumpiness (orange peel look) or lines in the finish.
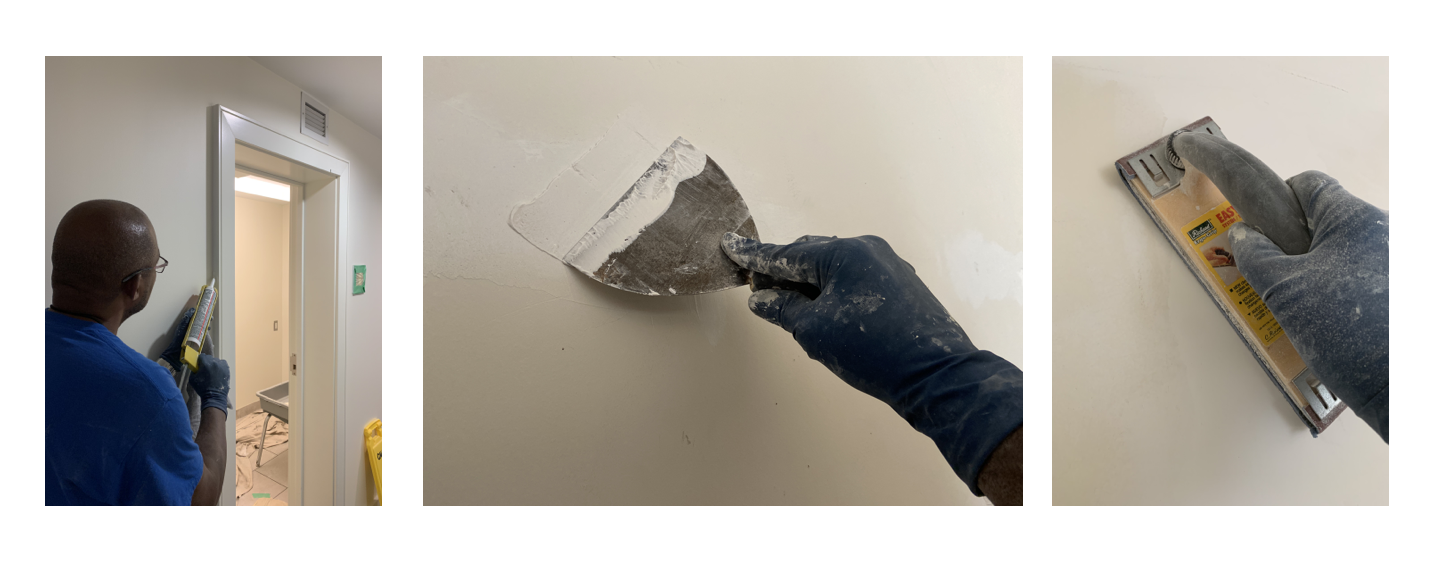
- Cracks: For repair using tape and plaster.
- Using a knife or utility tool, gouge the crack to a small “V” shape.
- Using a putty knife, apply plaster over and around the crack and put the tape on the plaster. Press the tape flat to the surface so it sticks to the plaster, using your putty knife.
- Put a very thin layer of plaster over the tape, avoiding creating any streaks or high spots. Wait to dry.
- Put another layer of plaster over the already dried plaster, as smoothly as you can, tapering it to the wall. Leave to dry.
- Once dried, scrape any raised spots or ridges then sand smooth with medium grit sandpaper.
- Repeat steps 4&5 until you have a smooth wall that hides the crack and no visible lines.
- Apply primer the the repaired area and paint the wall.
- Bumps:
- Using a scraper or putty knife, scrape bump from wall to a flat finish. You may have some gouging at this point.
- Apply spackle or plaster to wall in a thin sheet and as smooth as possible. Leave to dry.
- Repeat step 2 if the wall is still not smooth or doesn’t look flat.
- Sand smooth, spot prime and paint.
- Gouges and nail holes:
- Lightly sand area around gouge or hole with a medium sandpaper or sanding sponge.
- Apply spackle or plaster to wall in a thin sheet and as smooth as possible. Leave to dry.
- Repeat step 2 if the wall is still not smooth or doesn’t look flat.
- Sand smooth, spot prime and paint.
- Large Holes:
- Lightly sand area around hole with a medium sandpaper or sanding sponge.
- Fill hole with foam spray or other material if it is deep, then fill with plaster. *Alternately you can use a drywall repair patch to cover the hole. (The drywall patches comes in various sizes and have finer tape on it to stick to the wall. They are available at your local hardware store.)
- Apply spackle or plaster over the patch and wall in a thin sheet and as smooth as possible. Leave to dry.
- Repeat step 2 if the wall is still not smooth or doesn’t look flat.
- Sand smooth, spot prime and paint.
- Water Damage:
- Inspect the wall to assure it is dry and no water present. Repair the leak and source of the water if needed before proceeding.
- Lightly sand area around hole with a medium sandpaper or sanding sponge.
- Apply a stain blocker like; Kilz or Zinsser
- Paint.
- Flaking paint:
- Scrape and sand the flaking paint till all loose paint or wallboard is gone.
- If the drywall surface is broken, you will need to spot prime those areas with an oil paint.
- Plaster the wall in a skim coat to make it smooth if necessary. Sand to a smooth finish.
- Prime walls and paint.
- Soft walls:
- By touching and pressing the walls you will be able to detect if the wall is soft. Sometimes this is visible by a bulged or sunken look in areas of the wall. This indicates the the material of the wall has been damaged by impact, water or just deterioration because of age. You will need to replace this section of the wall.
- If it is a small area, you can cut it out and treat it as a large hole as outlined above.
- If it is a large area, it is best to call your professional to inspect and repair it. Your professional should be able to determinate source of the problem to see if there is anything else to be fixed, like water seepage or your children’s wrestling, before completing the wall repair.
There it is! Here ARE our professional tips on how to handle damaged walls and repair them. Check out our previous articles on how to proceed after you have repaired your walls. We have gone over How to Prepare your Walls for Paint, How to Choose which Paint Finish to Use, How to Paint your Walls and MORE! You can find all of our #LarrysLessons on the Articles Section of our website.
We hope you enjoyed! If you have any further questions, contact us at (416) 690-3890. Our professional advise works but our professional application is the best bet to get your home, office or property in tip-top shape.
For Professional Painting Inquiries:
www.larryspainting.ca
(416) 690-3890
sales@larryspainting.ca
We do FREE CONSULTATIONS! For the month of March 2023 we are offering 13% OFF!


